How to Photograph the Milky Way

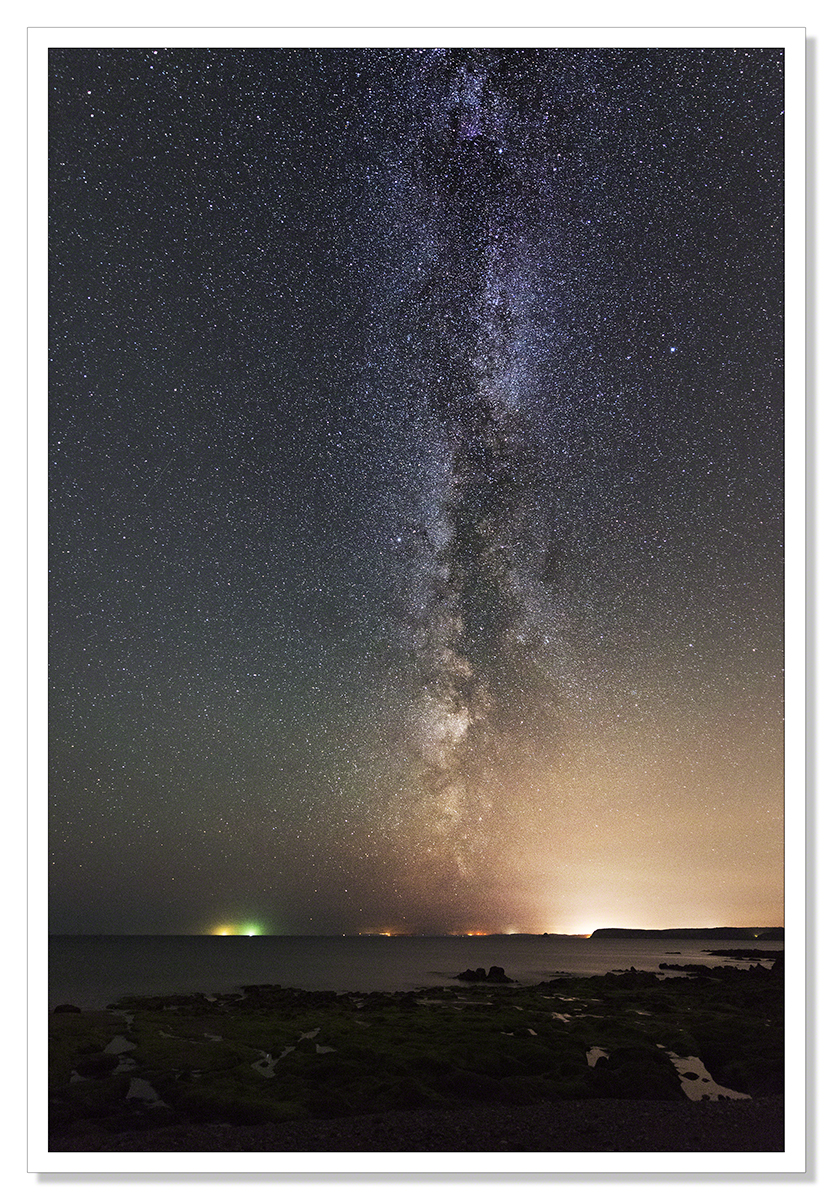
This tutorial covers the basic steps necessary to capture images like the one above. Our galaxy, the Milky Way, is shaped, as the late Sir Patrick Moore, (a BBC, well actually, national institution described it, a man who presented a late night astronomy programme for 55 years) like two fried eggs back to back. We live about halfway across the white. It’s about 25,000 light years to the centre of the galaxy and about 25,000 light years to the edge. With light travelling at 186,000 miles per second, getting your head around how far light can travel in an hour, let alone a year and then multiplying that by 25,000 to get to either the edge or the centre of the galaxy from where we are situated, it really is quite mind-boggling.
The size, the complexity, the multitude of stars and planets, standing on a beach or a cliff top with a camera pointed at the night sky, looking towards the edge of the galaxy that stretches like a huge arch above our heads, one really can feel very small and insignificant indeed. I had a little chuckle to myself, remembering ‘The Hitchhiker’s Guide to the Galaxy’ where in the opening chapter, Earth was demolished to make way for an intergalactic highway. With all attempts to contact us having been ignored, so wrapped up in the idea that we are the only ones, the highway was going ahead unchallenged and that was it, Earth was no more and the intergalactic bulldozers trundled on remorselessly.
Find a nice dark Sky
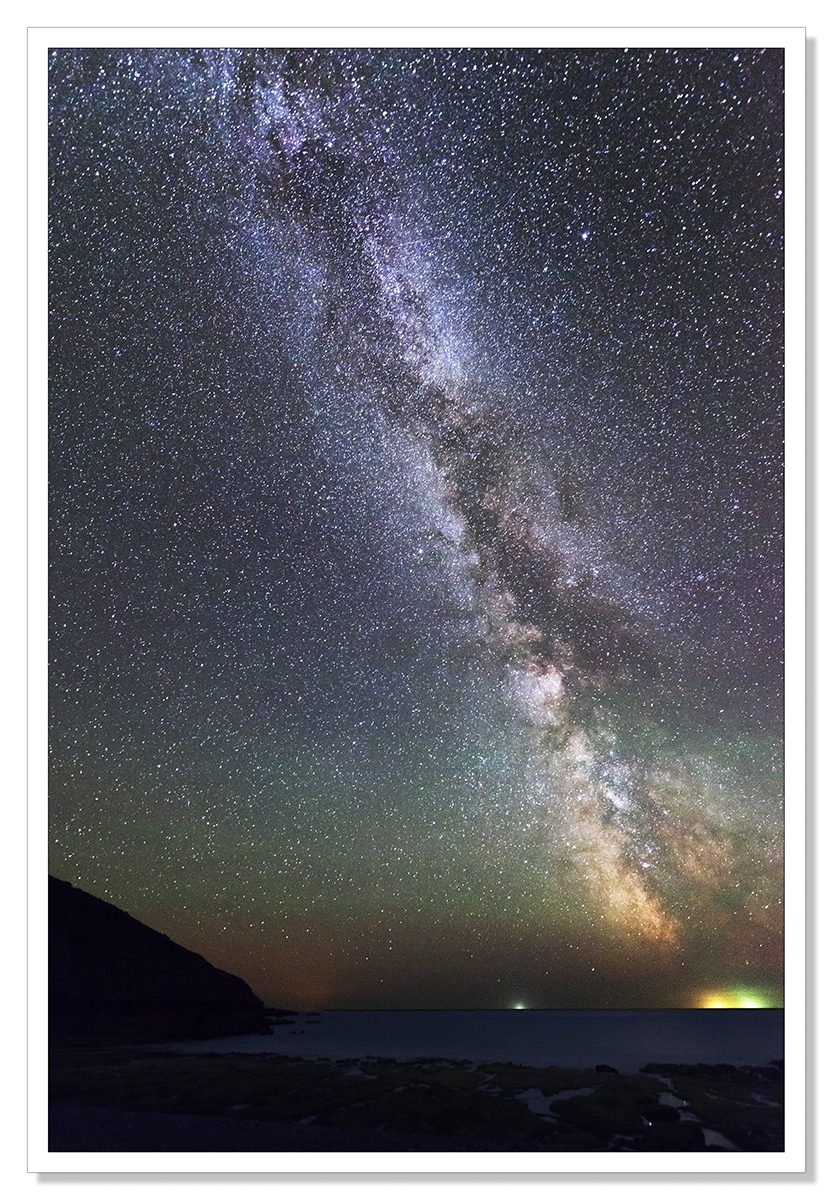
The first step is finding a dark sky without light pollution. This is becoming increasingly difficult as towns and cities spread. I’ve been using a website called Blue Marble to find areas local to me that should be dark, or at least dark enough to capture these images. I have a certain advantage in being able to find a nice flat relatively dark horizon looking out to sea but even then, darkness can not be guaranteed. The orange glow in the image above comes from a trawler or tanker. In the picture below the glow from Falmouth, and a few more towns around the coast plus what I think are navigation lights from a fishing trawler that was coming and going across the horizon clearly impact on the image but not disastrously so. The orange glow from the sodium lighting used the world over will wash out the further stars from your Milky Way image so really, get as far away as possible from towns and cities.
Locating the Milky Way
Once you’ve found yourself a nice dark area of countryside, you need to find the Milky Way. The best advice I can offer here is to look for what could be a ribbon of clouds across the sky on a clear night. The billions of stars that make up the Milky Way can appear just like that but if you look more closely at the cloud you’ll see that it’s made up of stars. To be more exact, the Milky Way extends from the constellation Scorpius (Scorpio) to the constellation Cygnas, (the swan) particularly the area closest to Sagittarius. There are a myriad number of apps available for smart phones that will help you locate what we’re talking about if you’re still nonplussed or if light pollution is obscuring the best of the Milky Way. Here in the UK at the moment the Milky Way can be seen directly overhead extending north-east to south-west at around midnight. Summer is a good time to see the Milky Way. In winter the sun is in the constellation Sagittarius introducing cosmic light pollution. The moon can also be a culprit so it’s best to view during the Lunar cycle when the moon is absent or new.
Tripod
Right, you’ve found a dark sky and you’ve located the Milky Way, what you now need is a sturdy tripod. With exposure times extending to 30 seconds, you cannot hold your camera still for that time. That said, don’t let not having a tripod hold you back. If you don’t have a tripod you could lay your camera on its back and set the self-timer. Setting the self-timer allows for the shutter to fire without jogging the camera.
Lens
To get the widest field of view, to get more of the Milky Way into your photograph, wide angled lenses are best. A typical kit lens would be 18-55mm. 18mm is a good starting point. If you can go wider, all the better. Faster lenses are better. By that I mean lenses that allow you to open the aperture to around f1.4, 2.8 or 3.5. This is simply because the wider the aperture, the more light you can collect on your sensor in the time the shutter is open.

Shutter Speed
We’re on the move as a planet, when you start taking pictures of the stars with long exposures, you’re going to get star trails if that exposure time is too long. To photograph the Milky Way we want to slow the shutter as much as possible before the star trails become too apparent. For this we use the 500 rule. Divide 500 by the focal length of your lens to arrive at a maximum exposure time before star trails appear. Wider angle lenses are better as they are going to give you a longer shutter speed allowing more star light to be collected by your sensor. I’ve been using a Nikkor 14-24mm f2.8.
Aperture
Set your aperture to its widest. As I’ve mentioned, ideally this will be between f1.4 and 3.5. If your lens doesn’t open that wide, it’ll be harder to get an image but not impossible. With a wide aperture however comes a narrow depth of field so you need to be quite precise in your focusing.
ISO
To get enough light on your image sensor, you’re going to have to make it more sensitive to light. This means upping the ISO to anything between ISO 1600 and ISO 6400. The higher the ISO, the more noise will be introduced into the image. I’ve experimented with higher ISO’s and shorter shutter speeds. Really it’s a trade-off. You’ll need to find the best shutter speed/ISO combination that works best for you. I have found with my Nikon D800e that even at ISO 6400 the noise factor isn’t any more troublesome than at ISO 1600. Hence, I’ve been able to set faster shutter speeds to get ultimately a sharper image of the stars. Faster shutter speeds mean less star blur. Despite the introduction of noise at such high ISOs, I’ve printed these images at A3 and they look really good.
Focusing on the Milky Way
You need to set your lens to infinity to get the Milky Way in focus. This is difficult to do on a dark night with no moon to provide a focus point for auto-focus to operate. You’re not going to see anything looking through your viewfinder, the camera is blind. If you have an infinity mark on your lens be wary of just setting to that mark. In my experience setting the lens at the infinity mark will not give you the sharpest picture. It should, and I’m not entirely sure why it doesn’t on a lens costing £1500 but there you are. Perhaps someone could explain that one to me. Anyway, what you really need to do is focus on a distant object while it’s still light enough for your auto-focus to operate. Once you’ve focused, switch the lens to manual and leave the focus ring alone.
This is all well and good but if you want to add foreground interest to your image, given a very wide aperture, if your stars are in focus, your foreground will not be. I have experimented with setting the lens at the hyperfocal distance which, according to the depth of field calculators (numerous ones available for smartphones), at f2.8 on a full frame camera, focusing on a point just 0.83m should give you a sharp image from half a meter in front of the camera to infinity. Sounds too good to be true and it is. This method gives you a very sharp foreground and the stars are OK but they will not be as sharp as they could be. The solution is to focus one image at infinity, and another at the hyperfocal distance and merge the images in Photoshop. If you shine a torch at the hyperfocal distance for whatever f-number you’re using (lots of depth of field apps available for smartphone) for foreground, (ideally f/8 or f/11 with a very long exposure), auto-focus will pick up the point. Once you’ve done that however, you’ve lost your infinity focus and no longer have the option to refocus to infinity because it’s dark. My solution has been to take very careful note of where the focus ring is set when auto-focussing on a distant object. I’ve then been able to return the lens to that point when I’m ready to shoot the stars once more. It’s a bit woolly and if your lens doesn’t have a focus distance scale on it, it’s difficult to do. Some trial and error is going to be required to find what works best for you, your camera and your lens.
That’s it, all you need to start capturing pictures of the Milky Way. Once you have your images and are back at home in front of the computer with a nice cup of tea, you’ll need to process them. I use Photoshop to process my images. Regardless of the software you use to process your pictures, the first thing you are likely going to want to adjust is the white (or colour in Photoshop) balance to remove any colour cast. You can then set about increasing contrast to bring out the detail. There are many tools available to help you get the best of your images these include Topaz Labs ‘Adjust’ and one of my favourites, Topaz DeNoise. If you don’t have Photoshop, it’s available as a full working trial via the Adobe website as are Topaz Lab’s plugins. I’m not going to go into too much detail about the processing of these images as there a million and one ways to go about it but the two most important areas to concentrate on are the white/colour balance and contrast and I’ve mentioned.
Have fun. I hope you find this useful.

![]()