Creating a Time Lapse Video using Photoshop CS6
First Steps
The first thing you’re going to need for a time lapse video is a time lapse sequence. Options for generating the sequence will vary with different cameras. With my Nikon D800, I used an MC-36 remote cord. with the MC-36, it’s possible to program an interval between shots and the number of shots required. You then just press the start button and put your feet up. The number of shots you’re ultimately able to take will be constrained by the size of memory card used and file settings.
If you shoot in jpeg, you’re going to get more shots than if you shoot in RAW, bearing in mind, if you do shoot in RAW, you’re going to have to process the images. You can batch process in Photoshop and Lightroom of course.
Shooting in jpeg makes sense and if you reduce the quality and size of the jpegs recorded, you can take a lot of shots on a 16 or 32GB memory card. This number will also vary with the number of megapixels your camera’s sensor records so I can’t give any hard a fast numbers here. Suffice to say, 400 shots taken at 5 second intervals will allow you to cover a time frame of 33 minutes or so and will give you a video that will last 16 seconds at 24 frames per second.
400 x 5 = 2000 seconds divided by 60 = 33.33 minutes. 400 divided by 24 (frames per second) = 16.66 seconds. It’s not difficult maths.

How you set the interval between shots depends on how dynamic the scene that you want to shoot. The smaller the interval, the smoother the video but if you’re setting up to shoot a seed germinating or a flower blooming, you’re not going to want to be taking frames every one to three seconds however, this would suit a more dynamic scene like traffic, a busy high street, clouds on a windy day etc. If you have an idea for a time lapse sequence, Google the idea. There’s a good chance someone else will have done it and suggested an appropriate shooting interval and fps number.
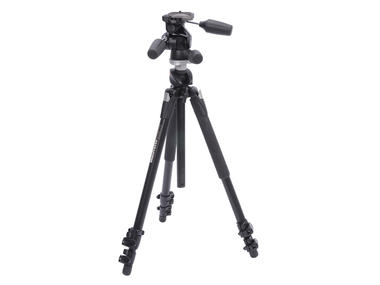
A tripod is essential. Each shot has to be framed the same as the last. A remote cord helps a great deal. If you don’t have a programmable remote cord, it’s still worth using it as if you’re manually pressing the shutter every 3 seconds, there’s a good chance you’re going to jog the camera. If you need to go the manual route, a stop watch would be a useful item in your kit bag.

It makes sense to set your camera to an automatic or semi-automatic mode so that the camera makes the required adjustments to exposure necessary whilst shooting the sequence.
Now all you have to do is frame your shot and start shooting. Ensure your camera is set to create files in a numbered sequence. Cameras invariably do but this is quite important for the next step.
The next step..
You should now have a file on your computer with a whole bunch of pictures in it. I used a 64GB memory card for my experimental time lapse sequence. I had it in my head that this would give me 798 shots basing this on the fact that I usually shoot RAW. I set the interval to 3 seconds on the remote figuring I’d be shooting for 40 minutes. I had set the camera to jpeg fine however and didn’t bother to check how many shots this would give me.
I set my tripod up on the patio, framed my shot, set the camera to auto, pressed start and came back indoors for some breakfast and to catch up on some blogs. An hour later the camera was still clicking away. It was then that it dawned on me that I had considerably more shots on my card than the 798 I’d expected. My time lapse sequence ended up consisting of 1797 shots. That was when I decided I probably had enough and I pressed stop on the remote.
The following video Tutorial shows you how I turned this sequence into a time lapse video using Photoshop CS6. Earlier versions may vary.
Be sure to click the HD button. The video in best viewed in full screen mode…

And this is the finished product. Not the most exciting time lapse sequence but I hope that you got something from learning how this is done.
Again, be sure to click the HD button and the video is best viewed in full screen mode. ;-)
I look forward to seeing some of your time lapse videos. If you have any questions, just leave a comment and I’ll do my best to answer them..

This entry was posted on June 7, 2013 by Chillbrook. It was filed under Photography, Tutorial and was tagged with Cornwall, Cornwall Photographic, Cornwall Photography, English Countryside, Landscape, Landscape Photography, Nikkor 24-70mm f2.8G ED, Nikon D800, Photography, Photography Tutorial, Photoshop Time Lapse Tutorial, Time Lapse Photography.


Brilliant – might just have to try this! 📷
June 7, 2013 at 6:00 pm
Thanks Adrian.
June 7, 2013 at 6:04 pm
Your instructions are so clear and easy to follow. Thanks for the lesson.
June 7, 2013 at 6:47 pm
You’re very welcome Gunta. :-)
June 7, 2013 at 6:54 pm
I may just give it a go sometime. Thanks for the prompt.
June 7, 2013 at 7:34 pm
:-)
June 7, 2013 at 8:24 pm
I thought the D800 came with an interval timer, and you did not need to use something else.
I think my D7000 has it as well, so I will be trying it; maybe this weekend.
Anyway, thanks for the information . . . although you neglected to mention what one should have for breakfast while waiting for the shoot to finish.
June 7, 2013 at 8:42 pm
You are right that the D800 will take time lapse sequences and produce a movie. I hadn’t got to page 207 in my manual yet.. :neutral: Of course making the movie in Photoshop, you’re able to add fades, soundtrack etc.. I will be reading the time lapse chapter in my manual in detail though.
I think for breakfast it has to be bacon and eggs with a big mug of tea! ;-)
June 7, 2013 at 9:19 pm
All those UFO’s going by, cool!
A great post Adrian.
June 7, 2013 at 9:37 pm
Thank you Karen. It’s a busy time for aliens arriving on these shores, 5am.. ;-)
June 8, 2013 at 7:29 am
Thanks for this. I suppose it goes without saying you should have a full battery to start with. And the music makes a big impact on the enjoyability of the presentation.
June 8, 2013 at 2:18 am
Thank you. Yes, a full battery is definitely a good idea. :-)
June 8, 2013 at 7:30 am
That is way cool! Could I pin this on my photo board on Pinterest?
Nancy
June 8, 2013 at 4:09 am
As a photo tip for the how-to.
June 8, 2013 at 4:09 am
Thank you Nancy. I’d be happy for you to pin it.
June 8, 2013 at 7:30 am
Sorry about the other note looking for permission to pin. I got myself confused – sorry!
June 13, 2013 at 4:45 am
Pinned to: http://pinterest.com/pin/140244975868898151/
June 13, 2013 at 4:47 am
Great post Adrian, very informative as per usual 😊
June 8, 2013 at 6:30 am
Thank you very much Mark. :-)
June 8, 2013 at 7:31 am
Tremendous TL Adrian and the tips and info was spot on! Time lapse videos are fun to make aren’t they? :-)
June 8, 2013 at 4:56 pm
Thank you Phil. I do enjoy making time lapse. I’ve got a few ideas for a couple of other sequences.. :-)
June 8, 2013 at 8:12 pm
Thanks for the tutorial.
How disappointed I was to realise the shooting star was just the first plane! :)
June 9, 2013 at 7:33 am
Thanks Noeline. I thought it was a shooting star too when I first saw it. But We’re on the main flight path for transatlantic flights heading for Heathrow at that time in the morning as you can see.. :-)
June 9, 2013 at 12:18 pm
Fantastic.. I now need a tripod and a programmable remote cord!!!
June 9, 2013 at 11:17 am
Thank you Lisa. It’s a fun thing to do.. :-)
June 9, 2013 at 12:18 pm
Very good tutorial, Adrian. Now I just need the right equipment. :)
June 9, 2013 at 3:37 pm
Thank you Sylvia. :-)
June 9, 2013 at 6:15 pm
This is so good… ‘m inspired to try it :)
June 10, 2013 at 3:55 pm
That’s good to hear. Thank you. I hope to see your time lapse video very soon! :-)
June 10, 2013 at 5:14 pm
A very helpful tutorial, Adrian. Thanks.
June 14, 2013 at 6:09 pm
Thank you Malcolm. I’m glad you found it so.
June 14, 2013 at 7:43 pm
Never tried time lapse – I’m minded to give it a go. Interestingly, the D800 has a time lapse function where it will produce the finished video – and alternatively an interval timer function where the photographer has complete control even to setting the start time – You don’t even have to get out of bed for the sunrise!
June 14, 2013 at 7:50 pm
I knew the D800 had a time lapse facility Malcolm but I’ve yet to make it to page 108 in the manual. I think the advantages of putting the video together in Photoshop are that you can add a soundtrack and carry out other editing functions. I guess though you could import the completed video from the camera onto a Photoshop timeline and then do the editing. I may give this method a try next time. I’m not great at reading manuals but I will make a point of reading this section before I make my next sequence. ;-)
June 14, 2013 at 8:51 pm
Great stuff, ChiB! Looks like your patio has a wonderful view of the sunrise, too. Must be nice!
July 22, 2013 at 3:09 am
Thank you Jon. It is a nice to have that view!
July 22, 2013 at 7:10 am
Great post, and thanks for the tips. Off to shoot my first time lapse this coming weekend, it should be an adventure. Beautiful work, and look forward to seeing more. Cheers!
August 1, 2013 at 2:42 am
Thank you very much. I’ll look forward to seeing what you come up with!
August 1, 2013 at 7:26 am
It’ll likely be terrible, but that is part of the fun of learning :-) Seeing the great time-lapse you & others have posted is inspiration to keep trying and improving… This will be a test of my patience!
August 1, 2013 at 3:40 pm
I’m sure it won’t be terrible. It is part of the fun though, learning as you go. :-)
August 2, 2013 at 6:37 pm
Thank you – I looked for some easy instructions 6 months ago – finally I have all the resources to give it a go, and it works great!
thank you again!
August 31, 2013 at 1:49 pm
I’m really glad you found this useful. Thank you.
September 1, 2013 at 12:22 pm
my photoshop cs6 is missing the “Layer -> Video Layers” menu option. Any idea what i am missing? thanks
September 9, 2013 at 2:51 am
I’m sorry, I can’t imagine why you wouldn’t see video layers in your layers menu. I did google the issue and didn’t find anything. Perhaps you could try uninstalling and reinstalling or contacting Adobe support if you have no luck.
September 9, 2013 at 7:12 pm
Thanks for the help, great tutorial! Just a follow up question, how does one adjust the length of the video? I thought changing the framerate would do so, but doesn’t appear so, which doesn’t make sense to me.
November 21, 2013 at 7:41 pm
I’m glad the tutorial was helpful. Changing the frame rate will have an impact on the length of your video. The quality will suffer at 16fps if you wanted to extend the sequence. The best way to change the length of your video is to take more or fewer shots initially and keep your frame rate around 24 or 28 fps. Check your settings carefully. You need to change the frame rate on the timeline as well as globally if my memory serves. I hope that helps. It’s been a while since I did a time lapse so I’m a bit rusty on detail.
November 22, 2013 at 9:24 am
Where would I set it globally? The only other place I know of is the option when you go to Export to render the video, is there somewhere else?
November 22, 2013 at 2:15 pm
Nevermind, I found what the problem is, if you want to have a different frame rate, you have to set it in the timeline PRIOR to making the video layer. Another helpful tutorial, also showing some effects you can add to the timeline. http://www.youtube.com/watch?feature=player_embedded&v=b5XU2_drU_s. Thanks for your reply and assistance.
November 22, 2013 at 2:39 pm
I’m glad you got it sorted. I remember that now as I had the same problem as you, trying to extend the film with a slower fps. Sorry I didn’t recall that straightaway.
November 25, 2013 at 10:56 pm
You were shooting manual for the sunset, correct? Do you remover your settings? I’ve had issues with the correct exposure initially (pre-sunrise) then the exposure was being blown out as the sun rose.
December 8, 2013 at 6:03 pm
Hi Rick, This is one occasion when I do set the camera to auto. You can use either full automatic if you have it or one of the program modes. The camera can then compensate for the quite extreme changes in required exposure during the course of your time lapse. Hope that helps.
December 8, 2013 at 6:57 pm
Thanks for that. Now..another question. I’ve always used Sony Vegas to create time lapse but that computer crashed and burned. My “new” computer can’t handle Vegas so now I’m attempting to use Photoshop. Everything is fine until I change the frame rate from 24 to 15. When I do that, the length of the “video” does not change. I have a one minute file at 24 and a one minute file at 15. Am I missing something? Thanks!
December 8, 2013 at 10:08 pm
No problem. You need to set the frame rate in the timeline before you add the video layer. You can’t change it once you’ve started.
December 9, 2013 at 7:59 am
Ahhhh…thanks
December 9, 2013 at 4:29 pm
You’re very welcome!
December 12, 2013 at 10:21 pm
Thank you so much! Cheers!
December 13, 2013 at 6:20 pm
You are very welcome!
December 13, 2013 at 7:35 pm
for some reason the video layer button does not exist. any ideas?
December 16, 2013 at 2:37 am
Do you mean when you go to that layers tab and get the drop down, video layers isn’t an option?
December 16, 2013 at 11:58 am
Very cool! Love it.
January 24, 2014 at 4:31 pm
Thank you Jim, it was a lot of fun to do!
January 24, 2014 at 11:13 pm
I’ve made a few timelapse using this method but I always like to see how someone explains it. Of all the versions, yours is is one of the best. Clear simple and accurate. Not sure but in CC photoshop, it appears you can alter the frame rate after creating the video layer. At least when I do change it, the timeline reflects the change (shorter or longer). Not sure how it will render. I’ll try that sometime.
What was the classical piece used during your time lapse? It’s perfect for the sunrise.
January 31, 2014 at 2:45 am
Thank you and thank you for commenting. The music is Mozart’s Clarinet concerto in A, K622.
January 31, 2014 at 6:26 am
Pingback: Time lapse: first go | Live Project
Pingback: First go at time lapsing | Time lapse project with Zoe & Kate
This is fabulous! Now I’m eager to make a video…once I learn how to use my new camera! Thank you for the wonderful tutorial. Your sunrise time lapse is gorgeous.
March 4, 2014 at 6:02 pm
Thank you, I’m glad you found the tutorial useful. :-)
March 4, 2014 at 6:56 pm
Thank you so much for this video with instructions. i am very thankful and happy now! You made my life easier with this, -and funnier! The video and the instructions was so easy to follow and l were able to make my first Time Lapse ever. I will never forget that! Thanks!!!
-Wish you all the Best!-
April 23, 2014 at 6:48 am
You’re very welcome, I’m so glad you found the tutorial helpful and easy to follow. Thank you for commenting! :-)
April 24, 2014 at 6:27 am
I tried time lapse on Photoshop only that it always says ‘this sequence has gaps’ just soon after
I choose fps, any idea?
June 6, 2014 at 1:08 am
Sorry for the late reply Reni. I’m really not sure what is going on with your time lapse. Have you tried googling the error message?
June 10, 2014 at 7:39 pm