
Neutral Density and Graduated Neutral Density Filters
I was asked by Leanne Cole to write an article for her excellent and very successful blog Leanne Cole Photography on the subject of neutral density and graduated neutral density filters and how I use them in my landscape photography. This is what I came up with. Most of the photographs you’ve seen before but they provide some good examples..
There are a few essentials that no landscape photographer should be without. There’s the camera of course and almost as importantly, there’s the tripod. Third on the list of landscape photography essentials is a set of Graduated Neutral Density Filters. Neutral Density filters are also useful although not essential so I’ll be mainly talking about ND Grads in this article suffice to say, neutral density and graduated neutral density filters are your camera’s equivalent of a pair of sunglasses. They cut down the amount of light reaching your camera’s sensor and whenever you cut down the amount of light reaching your camera’s sensor, whether it’s by stopping down the aperture or using a filter, exposure time is affected.
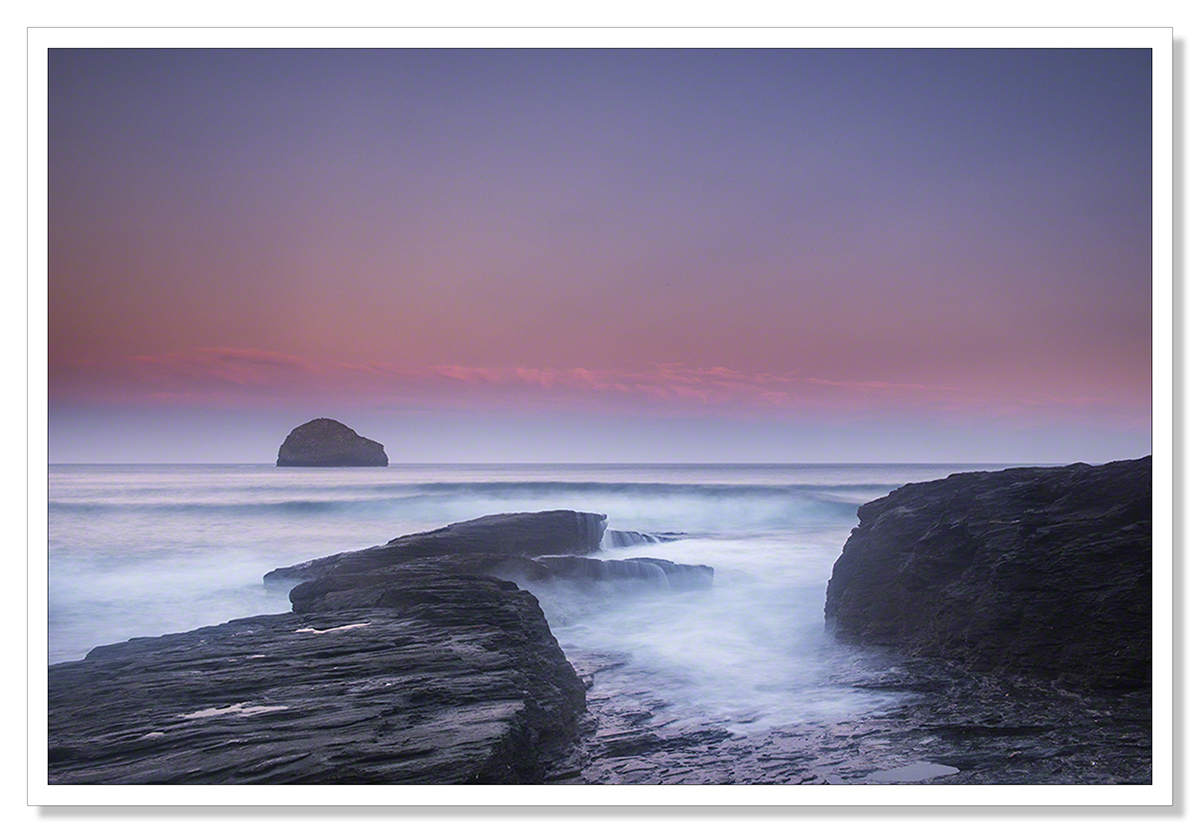
32mm f/22 4 sec ISO-100
Neutral density filters cover the whole of your lens and therefore cut down the light hitting the whole of the sensor. These are useful in extending exposure times allowing you to achieve that lovely silky water effect in rivers and waterfalls. These come in a variety of strengths right up to the now very popular 10 stop Neutral Density Filters. These allow just a tiny fraction of available light to enter the camera allowing you extend exposure times significantly allowing you flatten and smooth the ocean or achieve the silky, smoky water effect even in bright sunshine. These 10 stop filters are so dark it’s not possible to see through them so it’s necessary to compose your shot and focus before attaching the filter. Ten stop filters are often used by architectural photographers to simply make people disappear from busy buildings. All the time people are moving, they will not show up in a long exposure. There is a lot more I could say about using filters like the Lee Big Stopper but I’ll perhaps save that for another article and get back to my favourite filters of all, the Graduated Neutral Density Filter or ND Grad.

24mm f/9 1/500 sec. ISO-100
ND Grads are used to balance exposures. The sunglass effect is graduated such that skies are darkened leaving foregrounds unaffected. One sure fire thing that will let your photographs down from a technical standpoint is blown highlights and lost detail in shadows. These are very basic faults and the easiest ways to avoid them is to pack a set of ND Grads. If you have a bright sky and darker foreground, some of it in shadow, without filters you have two options, expose for the sky and you’re going to lose details in shadows; expose for the foreground and there is a good chance you are going to blow out the highlights in the sky. Strictly speaking you have a third option and that is to use exposure compensation and bracket a series of shots but I’ll get to that.
Once highlights are blown there is nothing in post processing that will allow you to bring them back. Conversely, modern sensors are very good at garnering every ounce of detail from any scene you are shooting but if your shadows are just too dark, attempts to recover them in post will give you blotchy unattractive results. You can’t make detail appear that just isn’t there and believe me I’ve tried. Attempts to do so look very messy indeed.
 ND filters normally come in sets of 3. The filters are labelled differently depending on manufacturer but a set will usually allow for a 1, 2 or 3 stop exposure compensation. The table below relates to both ND and ND graduated filters.

It’s important to note I think at this point that it’s worth spending a few pounds on these filters and avoiding the cheaper options you see on websites like Amazon. You can easily find a set of ND Grads for under a tenner if you look but anything you put in front of your lens will degrade your image. Why spend hundreds of pounds on a decent lens and then put a cheap piece of glass or worse, plastic, in front of it. These filters will last a lifetime if treated well so it’s worth saving a little before taking the plunge and buying a set.

50mm f/9 1/100 sec. ISO-100
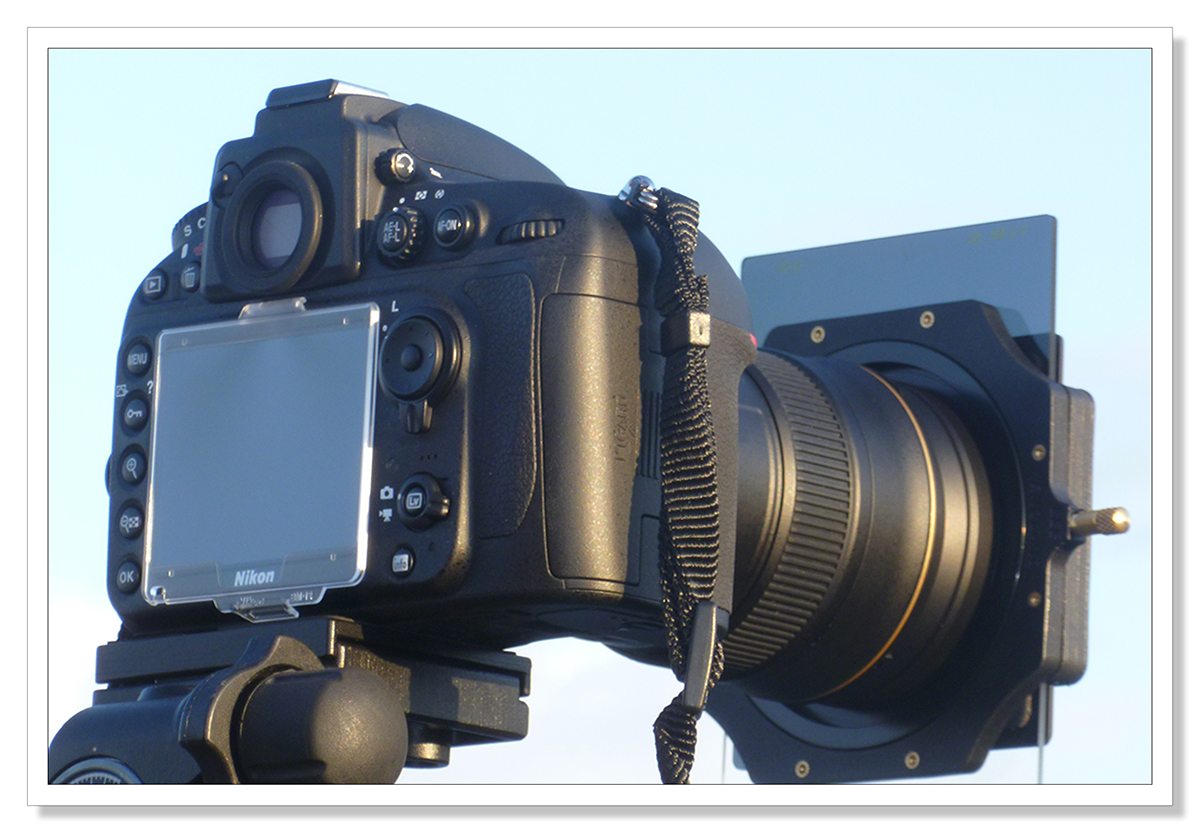
I use Lee filters because I think they are arguably the best and I have no affiliation with Lee. Hitech filters are right up there however and I’m hoping to put that to the test. Both of these companies offer 100mm filters with holder systems. When using my Nikkor 14-24mm lens, I use the Lee Super Wide system and 150mm filters. The bigger sizes really come into their own if you’re using wide angle lenses. Cokin Z-Pro filters are also 100mm I believe but I have no experience or knowledge of those. The first set of filters I had were of the smaller Cokin variety and I used to have to crop my wide angled shots rather defeating the object This was because the edge of the filters were picked up by my Nikkor 24–70mm lens at 24mm but if you’re on a budget, these are an ideal choice, certainly to get you started.
Another point to be made in favour of spending a few pounds or dollars is that Neutral Density Filters and ND Grads are so called because they have a neutral impact on the colour of your images, or at least they are supposed to. Not all ND and ND grad filters are created equally. Colour cast can be a real issue with cheaper filters and even with the more expensive ones when you get up to 10 stops. It can be corrected, using colour balance tools, but it’s best to try and keep things truly neutral from the start.
24mm 1/125 sec ISO-100
For most landscape shots, I like to keep my aperture constant at f/11 for maximum depth of field. You need to choose the right ND Grad to get the right effect. The sky is naturally brighter than the ground so you want to keep it that way. To achieve the most natural looking result you need to choose the right ND Grad to correct the exposure difference to within 1 stop.
If I point my camera at the sky, not the sun, and take a light reading and my light meter suggests a shutter speed of 1/200sec and I then point my camera at the foreground and take another light meter reading and my light meter suggests that to properly expose the foreground I need a shutter speed of 1/125 sec. This would be two stops and I would choose my 1 stop filter which would be my 0.3.
I would of course have the option of keeping my shutter speed the same at 1/200 sec. and opening the aperture from f/11 to f/9… This would still be two stops and I would still need my .03 filter to even the exposure.
Likewise, if my light meter suggested that to properly expose the sky at f/11, I would need a shutter speed of 1/250 sec. and to properly expose the foreground I would need a shutter speed of 1/125 sec. this would equate to one stop. I would therefore use my 1 stop .03 filter to darken the sky enough for me to shoot at f/11 and 1/125 sec. This would ensure I wouldn’t lose any details in the shadows and highlights wouldn’t be blown out in the sky. A balanced exposure in other words.

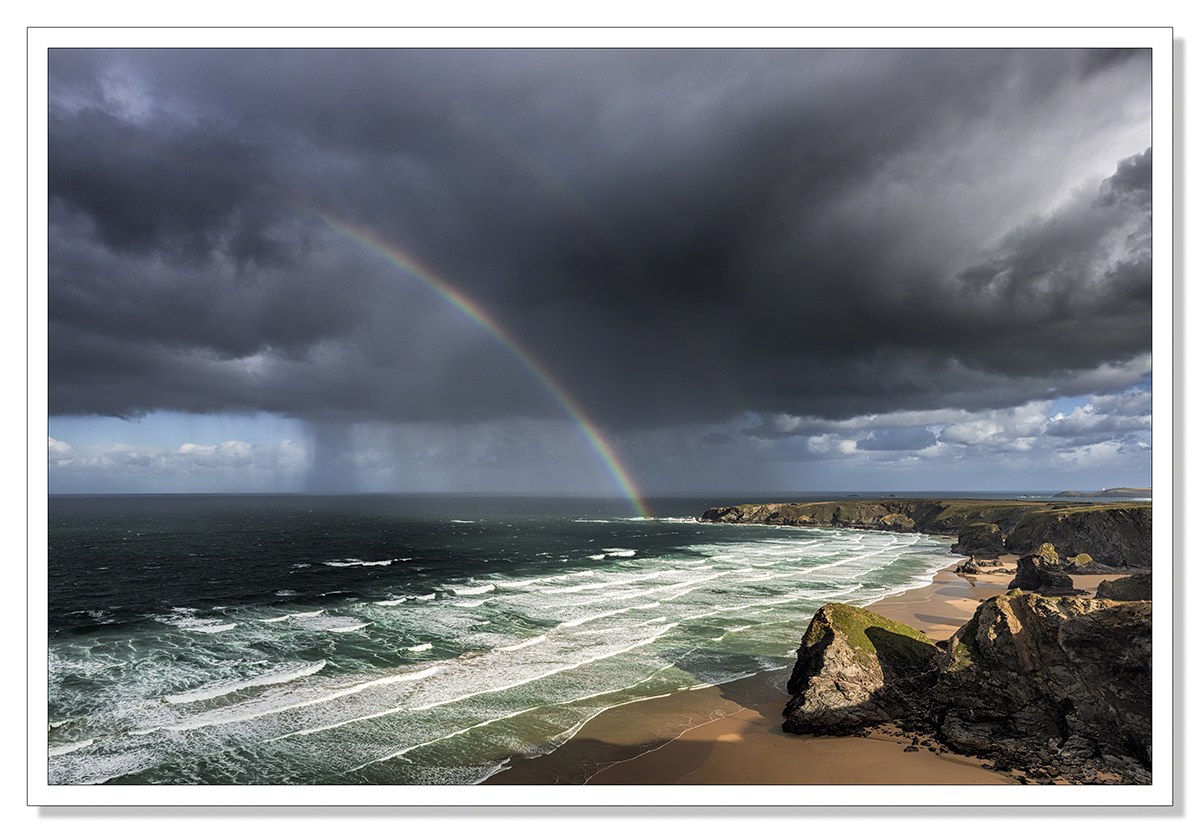
36mm f/11 1/160 sec. ISO-100
ND Graduated filters, as well as coming in different strengths as it were, they also come in hard and soft varieties. The hard and soft relates to the graduation between the darker glass and the lighter. Soft filters have a much more gradual division between the two halves. My recommendation would be to buy a set of hard ND Grads. It may be tempting to go for soft thinking this will allow for easier blending of the filter effect. The problem with soft grads is that often times you end up pushing the filter so far down the filter holder it’s nearly out the other side to darken a bright horizon. Having darkened the sky above the horizon sufficiently, because you’ve pushed the filter in so far, you end up with the area below the horizon being adversely affected by the filter.
The graduation on a hard ND Grad is not as stark as it at first might appear. You’re not going to see a hard line across your horizon unless of course, you set it too high but this is less likely because the hard edge also makes it much easier to set the filter in the right place. It’s not always easy to see through the lens, especially with the 0.3 filter, exactly where you need to set the filter. It soon becomes evident when you try and process the picture if you’ve set it in the wrong place however. A dark smudge right across your landscape does not look good. A dark sky with a bright strip just above the horizon doesn’t look good either but you’ll soon get the hang of setting the filter in the right place.

24mm f/11 1/125 sec. ISO-100
I had hoped to show some ‘with filter’ and ‘without filter’ photos to demonstrate just how effective these filters are in properly balancing an exposure but we have had thick fog in Cornwall for the last five days and with no let-up in sight, I’ve run up against my deadline for this article but please, take my word for it; with a set of these filters in your kit bag, you’ll be able to tackle shots you just might not be able to manage otherwise without under or over exposing one part of the picture or other.
This is where I should come back to bracketing as another way to balance awkward exposures. Bracketing can be very effective and when weather conditions make the use of filters awkward, I use this technique myself. But, bracketing is going to give you a whole lot of work to do in post that you just won’t have to do if you use filters. You can use programs like Photomatrix to make light work of merging bracketed shots but in my experience, this is difficult to do without getting an HDR like effect, even when using the ‘exposure blending’ rather than the ‘HDR’ option within Photomatrix. Filters are the best, and in terms of workflow, by far the most efficient option in my opinion.

15mm f/22 1.6 sec. ISO-100
As well as balancing exposures, you can also use a darker ND Grad than your light meter suggests for creative effect. I’ve peppered this article with photos I’ve taken where the use of a filter was essential in order to get a proper exposure and others where I’ve used a darker filter than was necessary to create drama or to otherwise enhance the sky.
With a decent set of filters and with these pointers in hand, the best advice I can give is to get out there, take photographs and experiment. For the added effort of a few minutes setting up, you’ll be amply rewarded, your landscape photographs will improve enormously and you’re going to look very professional to boot.


